Western Digital 2TB WD20EARS
High Load_Cycle_Count
After buying 2 new 2TB Western Digital Green hard drives and setting it up as part of a Linux software-based Raid 5, I noticed that the drives would 'click' every time a file is accessed after a period of inactivity. Running smartctl -a /dev/sdx would also trigger this 'click' to happen and would report the Load_Cycle_Count increment by one. What appears to be happening is the Western Digital drives are automatically parking the disk heads after a period of 8 seconds of inactivity. This will cause the head to 'click' every time it unparks when an IO request is made. The constant park/unparking of the heads causes an unnecessary amount of strain on the disks, which I very much want to minimize.
The SMART report showed the following:
=== START OF INFORMATION SECTION ===
Device Model:     WDC WD20EARS-00J99B0
Serial Number:    WD-WCAWZ0840640
Firmware Version: 80.00A80
User Capacity:    2,000,398,934,016 bytes
Device is:        Not in smartctl database [for details use: -P showall]
ATA Version is:   8
ATA Standard is:  Exact ATA specification draft version not indicated
Local Time is:    Fri Sep  2 23:26:17 2011 MDT
SMART support is: Available - device has SMART capability.
SMART support is: Enabled

=== START OF READ SMART DATA SECTION ===
SMART overall-health self-assessment test result: PASSED

General SMART Values:
Offline data collection status:  (0x80)Offline data collection activity
was never started.
Auto Offline Data Collection: Enabled.
Self-test execution status:      (   0)The previous self-test routine completed
without error or no self-test has ever
been run.
Total time to complete Offline
data collection:  (40200) seconds.
Offline data collection
capabilities:  (0x7b) SMART execute Offline immediate.
Auto Offline data collection on/off support.
Suspend Offline collection upon new
command.
Offline surface scan supported.
Self-test supported.
Conveyance Self-test supported.
Selective Self-test supported.
SMART capabilities:            (0x0003)Saves SMART data before entering
power-saving mode.
Supports SMART auto save timer.
Error logging capability:        (0x01)Error logging supported.
General Purpose Logging supported.
Short self-test routine
recommended polling time:  (   2) minutes.
Extended self-test routine
recommended polling time:  ( 255) minutes.
Conveyance self-test routine
recommended polling time:  (   5) minutes.
SCT capabilities:        (0x3035)SCT Status supported.
SCT Feature Control supported.
SCT Data Table supported.

SMART Attributes Data Structure revision number: 16
Vendor Specific SMART Attributes with Thresholds:
ID# ATTRIBUTE_NAME          FLAG     VALUE WORST THRESH TYPE      UPDATED  WHEN_FAILED RAW_VALUE
  1 Raw_Read_Error_Rate     0x002f   200   200   051    Pre-fail  Always       -       0
  3 Spin_Up_Time            0x0027   151   151   021    Pre-fail  Always       -       9441
  4 Start_Stop_Count        0x0032   100   100   000    Old_age   Always       -       16
  5 Reallocated_Sector_Ct   0x0033   200   200   140    Pre-fail  Always       -       0
  7 Seek_Error_Rate         0x002e   200   200   000    Old_age   Always       -       0
  9 Power_On_Hours          0x0032   100   100   000    Old_age   Always       -       72
 10 Spin_Retry_Count        0x0032   100   253   000    Old_age   Always       -       0
 11 Calibration_Retry_Count 0x0032   100   253   000    Old_age   Always       -       0
 12 Power_Cycle_Count       0x0032   100   100   000    Old_age   Always       -       12
192 Power-Off_Retract_Count 0x0032   200   200   000    Old_age   Always       -       8
193 Load_Cycle_Count        0x0032   200   200   000    Old_age   Always       -       121
194 Temperature_Celsius     0x0022   125   121   000    Old_age   Always       -       27
196 Reallocated_Event_Count 0x0032   200   200   000    Old_age   Always       -       0
197 Current_Pending_Sector  0x0032   200   200   000    Old_age   Always       -       0
198 Offline_Uncorrectable   0x0030   100   253   000    Old_age   Offline      -       0
199 UDMA_CRC_Error_Count    0x0032   200   200   000    Old_age   Always       -       0
200 Multi_Zone_Error_Rate   0x0008   100   253   000    Old_age   Offline      -       0
Although the Load_Cycle_count isn't that high, the drive was mostly either idle or busy rebuilding the raid array and doesn't justify the ~1.7 cycle counts per hour.
The solution to this is to run Western Digital's WDIdle3 utility which allows a custom timeout to be set instead of the default 8 seconds. Unfortunately, WDidle3 is a DOS only program and therefore the computer must be booted in DOS before the program can be executed.
If you're like me and don't have DOS readily available and have no CDRom or a floopy drive, the easiest way is to load up FreeDOS under PXE with the WDIdle3 utility as part of the FreeDOS image.
Preparing FreeDOS + Update Utility
Download FreeDOS and load the fdboot.img image with the WDidle3 utility
# mount -o loop -t vfat fdboot.img /mnt/freedos
# cp wdidle3.exe /mnt/freedos
# umount /mnt/freedos
Configure PXE to boot the fdboot.img image as a memdisk image in the PXE boot menu.
vi /tftpboot/pxelinux.cfg/default

# Then add the following entry:
label FreeDOS
kernel memdisk
append initrd=fdboot.img
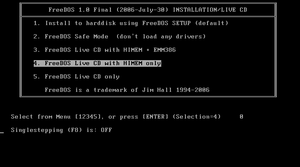
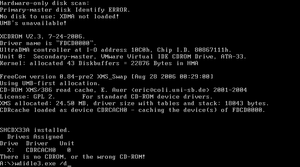
Boot into PXE and boot into FreeDOS. A grub menu should appear. Select #4 "FreeDOS Live CD with HIMEM only"
Run the WDIdle3 utility with /S or /D to disable the timer.
After disabling the timer in my WD20EARS, the Load_Cycle_Count remains virtually static and the 'click's have disappeared.

