Tuya WiFi Smart Plug
Tuya is a Chinese IOT company that creates many cheap smart devices including plugs, light bulbs, and switches. These smart devices connect to the cloud out of the box and lets the user easily control the device with their phone or a smart speaker. Some of these smart devices are sold under other brands from 3rd party resellers but uses the same underlying cloud infrastructure. The IoT device interacts with the cloud via HTTP and MQTT.
As these devices are always connected to the cloud, there are a few reasons to be wary of these IoT devices. As described by the 35c3 talk, risks include: the data that's collected by the company on your usage, the security of the data that's collected, and the ability for a malicious party to upload a trojaned firmware which can tunnel into your private network or access the internet via your device. The talk can be found at https://media.ccc.de/v/35c3-9723-smart_home_-_smart_hack
There are alternate opensource firmwares that can be loaded on these smart devices which will be discussed below.
Usage with stock Tuya firmware
The stock firmware requires setup with the Tuya app or with TuyAPI in combination with the Tuya Cloud. There is no way to set up the device without having it connect to Tuya's servers. If this is a concern, skip to the next section to learn how to change the stock firmware.
As part of the initial set up, after the WiFi credentials are shared with the smart device, the device will communicate with the Tuya Cloud to register itself via HTTP/HTTPS. Once registered, Tuya will send a randomized AES key to both the device and your phone. From this point on, communication to the device is done via MQTT or HTTP using this AES key.
The following three pieces of information is required to control a device using the Tuya firmware.:
- The device IP address
- UUID / Device ID
- localKey - AES 128 ECB Key
Retrieving this AES key after the initial set up has been difficult (as of 2020) because traffic between the plugs and Tuya are encrypted; traffic between Tuya and the SmartLife app is encrypted and SSL interception isn't possible; and the data stored by the SmartLife app is also encoded or encrypted. If you wish to obtain the AES key, the only method I had success with was to use the TuyAPI project. Alternatively, you could use the esptool.py utility to dump the flash and recover the localKey.
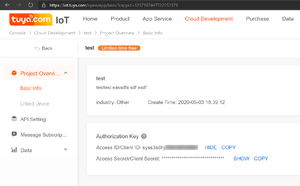
The TuyAPI project has instructions on obtaining the AES key at https://github.com/codetheweb/tuyapi/blob/master/docs/SETUP.md. After obtaining the tuya-cli tool, you will need to obtain a Cloud Development Project API key from Tuya which is required to register the device and obtain the AES key when the device is set up.
$ npm install @tuyapi/cli
$ ~/node_modules/.bin/tuya-cli  link --api-key ******************** --api-secret ******************************** --schema steamrdemo --ssid "WiFi Network" --password "Password" --region us
✔ Device(s) registered!
[
  {
    id: '********************',
    ip: 'X.X.X.X',
    localKey: 'cf39acf048ca0762',
    name: 'SP25'
  }
]
MQTT Interaction
The Tuya smart plugs will attempt to connect to a MQTT server at mq.gw.tuyaus.com on port 1883. You can either use this server or override the DNS entry within your network to point to a self-hosted MQTT server. The device subscribes to the topic smart/device/in/$DEVICE_ID; encrypted commands published will be processed by the device. Encrypted messages generated by the plug will be published to the topic smart/device/out/$DEVICE_ID.
All messages sent to and received from the plug must be JSON and encrypted using the AES key that was generated when the device was first set up also known as the localKey. The steps to encrypt a message are:
- JSON payload must be minimized with extra spaces removed
- The JSON message is then encrypted using AES ECB using the 128bit AES localKey.
- A MD5 hash of
data=$Cyphertext||pv=2.1||$LocalKeyis computed. - The final message concatenates
"2.1" + MD5[8, 24] + $CypherText
A message payload sent to the Tuya plug looks something like the following
{
    "protocol": 5,
    "t": 0,               // set to current unix timestamp
    "data": {
        "devId": "",
        "dps": {          // dps values trigger specific GPIO pins
            "1": true,
            "7": true,
            "11": 0,
            "101": 0
        }
    }
}
Messages generated by the plug will be sent to the topic smart/device/out/$DEVICE_ID and will be encrypted with the same algorithm outlined above. Plugs with additional capabilities such as power monitoring will also report these values to this topic multiple times per minute.
Node-RED integration with MQTT
You can use Node-RED and MQTT to control the Tuya smart plugs. I was able to get reliable triggering after changing the flows to use MQTT exclusively.
I implemented the encryption and decryption nodes as a function node. The node expects the AES key to be passed as msg.localkey and will encrypt or decrypt the value given at msg.payload. You will need to install the CryptoJS library and then inject it to the Node-RED environment by editing settings.js and adding CryptoJS:require('crypto-js') in functionGlobalContext.
The node to encrypt:
var CryptoJS = global.get("CryptoJS");

// mqtt topic
msg.topic = "smart/device/in/" + msg.deviceid;

// the payload data (time and device id)
msg.payload.t = Math.round((new Date()).getTime() / 1000);
msg.payload.data.devId = msg.deviceid;

// payload as json
text = JSON.stringify(msg.payload);

// encrypt json payload
t = CryptoJS.AES.encrypt(text, CryptoJS.enc.Utf8.parse(msg.localkey),
    { mode: CryptoJS.mode.ECB,  keySize: 128 });
cyphertext =  t.toString();

// generate md5 hash
hash = "data=" + cyphertext + "
The node to decrypt:
var CryptoJS = global.get("CryptoJS");

key = CryptoJS.enc.Utf8.parse(msg.localkey);
cypher = msg.payload.substring(19);
e = CryptoJS.AES.decrypt(cypher, key,
    { mode: CryptoJS.mode.ECB,  keySize: 128 });
msg.payload = JSON.parse(CryptoJS.enc.Utf8.stringify(e).toString());

return msg;
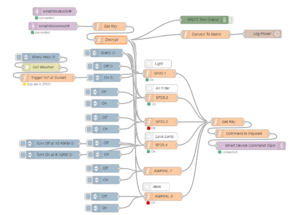
In an effort to make the flows more manageable, I inject the localKey from a single node. My flows ended up looking like this.
Node-RED integration with TuyAPI
If you don't want to use MQTT, you can still control a Tuya plug using the TuyAPI package which uses a HTTP API. I have found this to be more unreliable than MQTT and I do not recommend this method. Issues I've encountered while using these libraries include unreliable triggering (where calls to turn on or off a plug are missed), or where triggering causes some undefined behavior (such as the plug resetting, disconnecting from WiFi, or toggling the switch rather than turn on or off). For Node-RED integration, use the tuya-smart contrib package which provides nodes that interfaces with the TuyAPI library.
To get started, install (node-red-contrib-tuya-smart) on the Node-RED server. If using docker, install it in the Dockerfile.
By default, the Tuya node will run the default command that is configured in the node ({"schema": true} which polls all status information). You can override the command by pushing a message into the node's input. To turn the plug on, send {"set": true, "dpsIndex": 1} as a payload to the tuya node input. Refer to my reverse engineering notes in the section below for the other DPS values relevant to the AWP04L model. You may wish to convert the DPS index values into named values using a function node as well. What I ended up doing was:
msg.payload.status = {
    "state":  msg.payload.data.dps[1],
    "timer": msg.payload.data.dps[2],
    "amps": msg.payload.data.dps[4] / 1000.0,
    "watts": msg.payload.data.dps[5] / 10.0,
    "volts": msg.payload.data.dps[6] / 10.0,
}
delete msg.payload.data;

return msg;
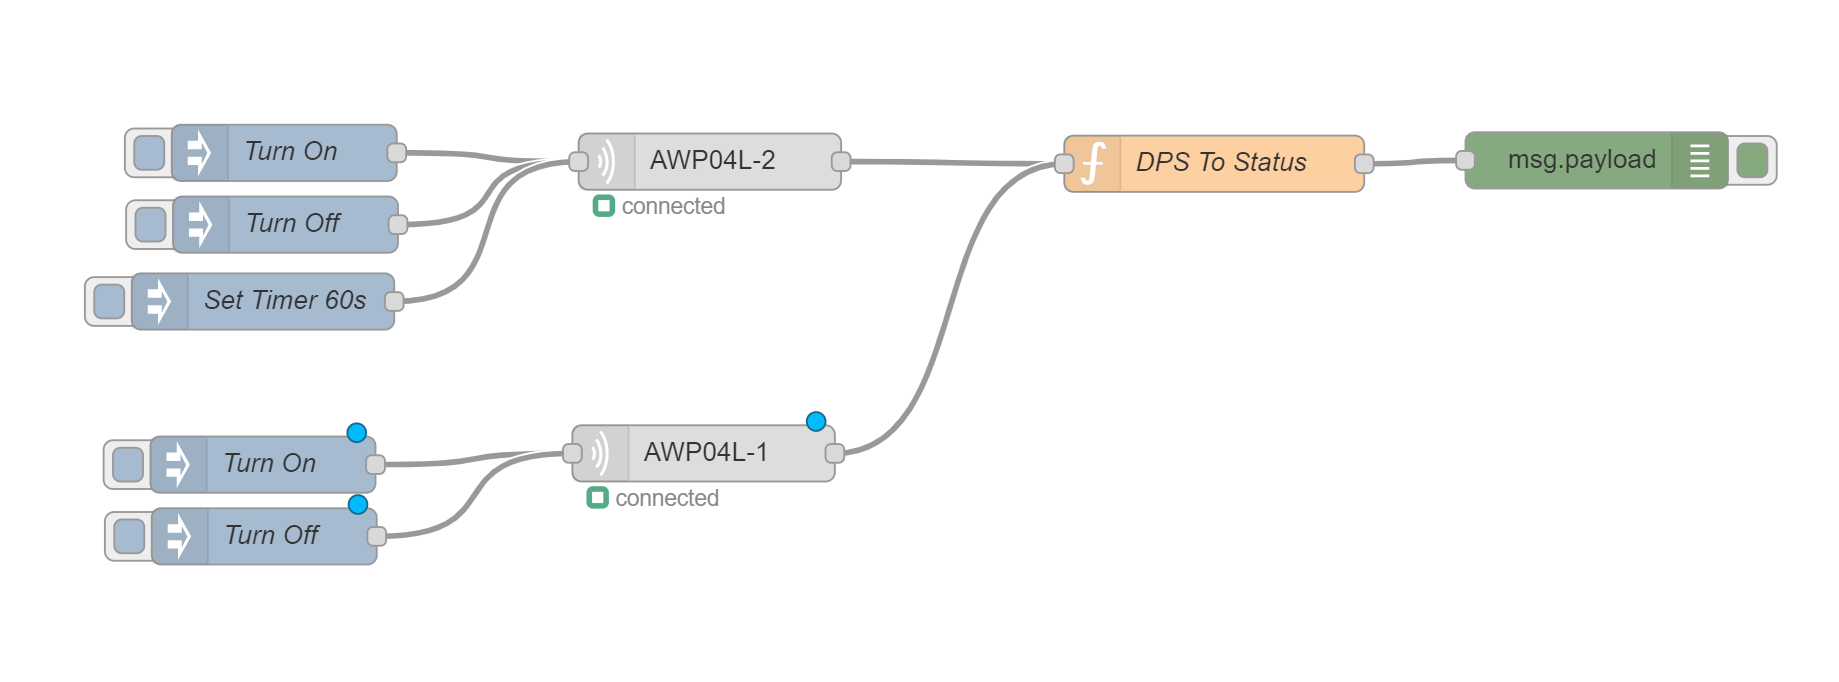
The flow I ended up with looks something like this:
Flashing Tasmota with Tuya-Convert
Read more from the project website at https://github.com/ct-Open-Source/tuya-convert. I suggest watching the talk https://media.ccc.de/v/35c3-9723-smart_home_-_smart_hack on for more information on how the Tuya-Convert script works.
The Tuya-Convert project simplifies the flashing of the Tuya smart plugs. It turns a Linux computer with a wireless adapter into an access point along with all the necessary services (DNS, HTTP, MQTT) to fake an update server. When a Tuya device enters Smart Config mode, it will listen for WiFi credentials by a UDP broadcast. The Tuya-Convert script will broadcast the WiFi credentials and initiate a firmware update to an intermediate firmware. Once the device comes online using this intermediate firmware, you can flash the device firmware with either Espurna or Tasmota. Both are custom open source firmware with excellent sets of features, though Tasmota appears to be more popular and active and is what I am using.
To get Tuya-Convert running as a container in Docker, you will need a computer running Linux with Docker and Docker Compose installed. Clone the Tuya-Convert project and build the docker image with the provided Dockerfile. Create a new directory to work from and copy the example docker/docker-compose.yml file there. The only thing that you need to edit is the wireless adapter device. Leave the vtrust-flash AP alone. The container will run in privileged mode and will have direct access to the wireless adapter. Depending on the system you're using, you may need to disable NetworkManager because it may try to reconnect you to a known network when the container attempts to create an access point. Disabling the firewall might be necessary to ensure the services spun up within the container are visible.
Start the docker container with docker-compose up -d. Start the automated flash script with docker-compose exec tuya start. At this point, an access point called vtrust-flash should be created. Connect your phone (or some other device) to this network and then put a Tuya device in setup mode by pressing and holding the button until it starts flashing rapidly (around twice per second).
======================================================

IMPORTANT
1. Connect any other device (a smartphone or something) to the WIFI vtrust-flash
   This step is IMPORTANT otherwise the smartconfig may not work!
2. Put your IoT device in autoconfig/smartconfig/pairing mode (LED will blink fast). This is usually done by pressing and holding the primary button of the device
   Make sure nothing else is plugged into your IoT device while attempting to flash.
3. Press ENTER to continue

======================================================
Press [Enter] to begin. If all goes well, it should be able to find the Tuya device, download its existing firmware, upload either Tasmota or Espurna firmware, and then restart. The output from a successful flash follows.
Starting smart config pairing procedure
Waiting for the device to install the intermediate firmware
Put device in EZ config mode (blinking fast)
Sending SSID                  vtrust-flash
Sending wifiPassword
Sending token                 00000000
Sending secret                0101
................
SmartConfig complete.
Resending SmartConfig Packets
..../start_flash.sh: line 129:   902 Terminated              ./smartconfig/main.py
........................
IoT-device is online with ip 10.42.42.42
Fetching firmware backup
  % Total    % Received % Xferd  Average Speed   Time    Time     Time  Current
                                 Dload  Upload   Total   Spent    Left  Speed
100 1024k  100 1024k    0     0  59402      0  0:00:17  0:00:17 --:--:-- 33272
curl: Saved to filename 'firmware-123a08.bin'
======================================================
Getting Info from IoT-device
VTRUST-FLASH 1.5
(c) VTRUST GMBH https://www.vtrust.de/35c3/
READ FLASH: http://10.42.42.42/backup
ChipID: 123a08
MAC: CC:50:E3:12:3A:08
BootVersion: 4
BootMode: normal
FlashMode: 1M DOUT @ 40MHz
FlashChipId: 144068
FlashChipRealSize: 1024K
Active Userspace: user2 0x81000
======================================================
Ready to flash third party firmware!

For your convenience, the following firmware images are already included in this repository:
  Tasmota v8.1.0.2 (wifiman)
  ESPurna 1.13.5 (base)

You can also provide your own image by placing it in the /files directory
Please ensure the firmware fits the device and includes the bootloader
MAXIMUM SIZE IS 512KB

Available options:
  0) return to stock
  1) flash espurna.bin
  2) flash tasmota.bin
  q) quit; do nothing
Please select 0-2: 2
Are you sure you want to flash tasmota.bin? This is the point of no return [y/N] y
Attempting to flash tasmota.bin, this may take a few seconds...
Flashed http://10.42.42.1/files/tasmota.bin successfully in 11539ms, rebooting...
Look for a tasmota-xxxx SSID to which you can connect and configure
Be sure to configure your device for proper function!

HAVE FUN!
Once the device has been flashed with Tasmota, it will come back up in configuration mode with an open access point named tasmota-xxxx. Connect to the network and configure the WiFi settings in a web browser. Once saved, it should connect to your WiFi network or if it fails, it will fallback into the configuration mode again where you can update the network settings again.
The firmware loaded by tuya-convert is intended to be an intermediate firmware. Use the default update server URL to pull the latest OTA firmware. The device will reboot after it is done. Firmware upgrade takes a few minutes.
With the latest version firmware installed, set the device up to your specific model. Look up your model at https://templates.blakadder.com/ and copy the configuration template. Apply this template on the Tuya device under 'Configuration' -> 'Configure other'. The templates of the two models I own are:
- Teckin SP25:
{"NAME":"Teckin SP25","GPIO":[56,255,255,255,255,255,0,0,22,17,255,21,255],"FLAG":1,"BASE":18}
- AWP04L:
{"NAME":"AWP04L","GPIO":[57,255,255,131,255,134,0,0,21,17,132,56,255],"FLAG":0,"BASE":18}
The plugs I've set up also have WIfiManager disabled (so that it will not enter configuration mode when it fails to connect). MQTT is enabled with the topic set to the device name and the master topic set to tasmota/device-name/. The web server is also disabled to save resources.
Troubleshooting
Device did not appear with the intermediate firmware
If your Tuya device is not being detected, you will see the following messages where the script retries. Ensure that you have another device connected to the vflash-trust AP.
.................
SmartConfig complete.
Resending SmartConfig Packets
.................
SmartConfig complete.
Resending SmartConfig Packets
..................
SmartConfig complete.
Resending SmartConfig Packets
.............
Device did not appear with the intermediate firmware
Check the *.log files in the scripts folder
Flashing Failed
One of my attempts failed with this error:
Attempting to flash tasmota.bin, this may take a few seconds...
Flashing http://10.42.42.1/files/tasmota.bin failed after 5011ms, HTTP -11
Do you want to try something else? [y/N]
At this point, the Tuya device is still connected and pingable at 10.42.42.1. Retry the flash again and it should succeed.
Reverse Engineering
These Tuya smart plugs are hard coded to these servers:
- mq.gw.tuyaus.com via MQTT
- a.tuyaus.com via HTTP
To self host these services, you will need to hijack the DNS records to your self hosted service.
MQTT communication is encrypted with 128-bit AES ECB using the localKey as the encryption key. The topic is smart/device/out/device_id. Because it is using ECB, similar messages will have similar cipher texts as seen below.
smart/device/out/02200194dc4f22135606 2.1f9d6aaa8c028751dtahaVgb6sZEC2uRNfToAVHb+qE94qh+hk1R7VkGt0djgWetQX1e4IxSvtQYLfwBhOA9eLsEfLfBdgpfZV3z0kkeUENQM7x/OcUTnhv31fBPFcxdihiAfGBTUgtG1OUjL
smart/device/out/02200194dc4f22135606 2.1468d26b81e3787aatahaVgb6sZEC2uRNfToAVHb+qE94qh+hk1R7VkGt0djgWetQX1e4IxSvtQYLfwBhOA9eLsEfLfBdgpfZV3z0kkeUENQM7x/OcUTnhv31fBPK039bcLeTGse/67AOz6Lm
smart/device/out/02200194dc4f22135606 2.1c320cd2dfa2d20e1tahaVgb6sZEC2uRNfToAVHb+qE94qh+hk1R7VkGt0djgWetQX1e4IxSvtQYLfwBhOA9eLsEfLfBdgpfZV3z0kkqeR4eguTTZfmoDnLO6Gsv8UBqGAblVCndgzJmUDrlO
smart/device/out/02200194dc4f22135606 2.168c2d8f05211a108tahaVgb6sZEC2uRNfToAVMhq/cediwGM0WFFnEJ4kvvgWetQX1e4IxSvtQYLfwBhOA9eLsEfLfBdgpfZV3z0khHz8nKhR2hdXlCbUYtj/GjX0qFqGa/6s3uSB36TRSSE
smart/device/out/02200194dc4f22135606 2.15447b84b25063944tahaVgb6sZEC2uRNfToAVOiDIlXh48IBRomThtqXzoDnn+1z5MCcHEIrwfVuPfvgpu5AYqA77Ys1ADM0zpHXV6YJLnpWJXghRTcedNpbhfpkK5IMk+UvEQNenmF0sduA
smart/device/out/02200194dc4f22135606 2.1f5542a52dabfcf73tahaVgb6sZEC2uRNfToAVOiDIlXh48IBRomThtqXzoDnn+1z5MCcHEIrwfVuPfvgpu5AYqA77Ys1ADM0zpHXV0RQlDrQca4knVjDakm02aatECxAMdcGsMmLjUtCk0mr
smart/device/out/02200194dc4f22135606 2.15ef756451e1db8aatahaVgb6sZEC2uRNfToAVGtwt9PXVjhurww9gAAsVUXnn+1z5MCcHEIrwfVuPfvgpu5AYqA77Ys1ADM0zpHXV6YJLnpWJXghRTcedNpbhfqVhbDB6i1efHyNUnWaDsr/
smart/device/out/02200194dc4f22135606 2.15c4fe47ade0801e7tahaVgb6sZEC2uRNfToAVGtwt9PXVjhurww9gAAsVUXnn+1z5MCcHEIrwfVuPfvgpu5AYqA77Ys1ADM0zpHXV0RQlDrQca4knVjDakm02abAea+OhxGULiAXXFiilhMA
The payload in plain text looks like this:
{"protocol":4,"t":27,"data":{"devId":"02200194dc4f22135606","dps":{"1":true,"2":0}},"s":9}
The device also phones home via HTTP. It appears that blocking HTTP completely will render the device somewhat crippled. Certain features such as voltage / wattage are unavailable.
A few captured requests are shown below.
POST /gw.json?a=atop.online.debug.log&gwId=0220xxxxxxxxxxxxxx606
GET
Array
(
    [a] => atop.online.debug.log
    [gwId] => 0220xxxxxxxxxxxxxx606
    [t] => 1317
    [sign] => 0214c93ac7dc7d6f3834d6dfda475e3a
)

POST
Array
(
    [data] => D37735B04A...
)

Headers:
Content-Type: application/json;charset=UTF-8'
Content-Length: 56'
Content-Language: zh-CN'
Server: Tuya-Sec'
User-Agent: Go-http-client/1.1

Response from Server:
{"result":true,"t":1566787618,"e":false,"success":true}
POST /gw.json?a=s.gw.dev.timer.count&gwId=0220xxxxxxxxxxxxxx606
GET
Array
(
    [a] => s.gw.dev.timer.count
    [gwId] => 0220xxxxxxxxxxxxxx606
    [t] => 7614
    [sign] => 2d9833c929f652d72a905d1459ea6b7a

)

POST
Array
(
    [data] => D377...
)

Headers:
Content-Type: application/json;charset=UTF-8'
Content-Length: 56'
Content-Language: zh-CN'
Server: Tuya-Sec'
User-Agent: Go-http-client/1.1

Response from Server:
{"result":{"devId":"0220xxxxxxxxxxxxxx606","count":0,"lastFetchTime":0},"t":1566787629,"e":false,"success":true}
tuya python
The status output from the AWP04L smart plug looks like this. The plug has monitoring features and should return the voltage, amps, and watts.
{u'devId': u'02200194dc4f22137d7f', u'dps': {
u'1': True,        outlet status
u'2': 0,           timer, decrements by 5, in seconds
u'5': 56,          watts (5.6)
u'4': 73,          amps (0.073 amps)
u'6': 1198         volts
}}

{u'devId': u'02200194dc4f22135606', u'dps': {u'1': True, u'2': 0, u'5': 187, u'4': 176, u'6': 1190}}
I don't understand why amps * volts != watts...
You will probably still need to allow it to connect to the cloud once. If you don't let it completely connect, some features like voltage/wattage are disabled from the output (?). MQTT must be working, or else these features are disabled:
{u'devId': u'02200194dc4f22135606', u'dps': {u'1': True, u'2': 0}}
>>> x.status()
{u'devId': u'02200194dc4f22135606', u'dps': {u'1': True, u'2': 0}}
>>> x.status()
{u'devId': u'02200194dc4f22135606', u'dps': {u'1': True, u'2': 0}}
>>> x.status()
{u'devId': u'02200194dc4f22135606', u'dps': {u'1': True, u'2': 0, u'5': 0, u'4': 0, u'6': 1184}}
>>> x.status()
{u'devId': u'02200194dc4f22135606', u'dps': {u'1': True, u'2': 0, u'5': 0, u'4': 0, u'6': 1184}}
>>> x.status()
{u'devId': u'02200194dc4f22135606', u'dps': {u'1': True, u'2': 0, u'5': 0, u'4': 0, u'6': 1184}}
See Also


