Buffalo TeraStation TS5400
The TeraStation TS5400 is a consumer network attached storage (NAS) unit manufactured by Buffalo Technology from around 2012. The official firmware appears to be updated by Buffalo even after 8 years since its release (links below).
This unit has the following hardware specs:
| CPU | Intel Atom D2550 @ 1.86GHz |
|---|---|
| RAM | 1x 2GB DDR3 1066MHz SODIMM |
| Chipset | Intel I/O Controller Hub 10 (ICH10) family |
| Disk | 4x SATA II (revision 1.0a), AHCI |
| Network | 2x Intel 82574L Gigabit |
| USB | 2x USB 2.0, and 2x USB 3.0 |
| Serial | 1 rear serial port |
| Video | 1 VGA output |
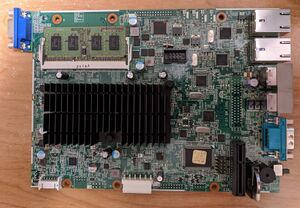
The low powered Atom CPU is passively cooled. The single 2GB DDR3 SODIMM memory module can be upgradable to a 4GB with the appropriate DDR3 SODIMM at 1066MHz (8GB does not seem to work). Up to four SATA disks are connected via a 4x PCI-e daughter board and are limited to SATA II at 3GBit/s. It can boot from either USB or HDD and the option is selectable via the on-board switch and cannot be changed in the BIOS menu. Using a USB SD card reader, the unit can boot into Linux using a SD card.
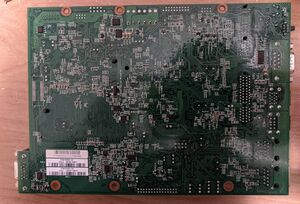
The motherboard appears to be manufactured by USI and is called SUGI. Full dmidecode output can be seen at https://paste.steamr.com/view/dd2bebf4.
System benchmark results can be found at Benchmark for Buffalo Terastation TS5400.
I was fortunate enough to pick up a unit for less than $80 with shipping from Ebay after 8 years since its release considering the unit cost well over $1000 originally.
Performance
Using CentOS 8 with ZFS 0.8.2, write speeds to a striped 2x 8TB SATA (Seagate, SMR disks) ZFS pool was about 200mb/s.
Sequential samba write speeds were at ~83mb/s and read speeds maxed out the gigabit connection at ~108MB/s. NFS write speeds were slightly better at almost 90mb/s.
ZFS recv seems to sustain ~60mb/s before nc hits 100% CPU. (Initially 33.5mb/s, 584GB/5hr, but this is because of a slow source).
GPIO
Buttons
The Buffalo TeraStation utilizes a IT8721F chip (startup kernel messages shows: it87: Found IT8721F chip at 0xa10, revision 3). The it87 driver doesn't quite work for this specific model and needs a hack. See the Debian on Intel Terastations project or my repo with their changes for the 4.18 kernel for CentOS 8 at https://git.steamr.com/leo/it87.
The small button is GPIO 20 while the function button is GPIO 21.
SATA
The Intel ICH chipset can be interfaced via the gpio-ich module. In order to hot-swap a drive, you will need to enable all the SATA ports using GPIOs because the BIOS appears to disable power to the SATA ports if it does not detect a drive when first powered on.
According to the same Debian on Intel Terastations project, there is a script to do just this. The GPIO pins are mapped as:
#HDD_Power0 --> GPIO17
#HDD_Power1 --> GPIO1
#HDD_Power2 --> GPIO6
#HDD_Power3 --> GPIO7
#HDD_Power4 --> GPIO25 or GPIO56
#HDD_Power5 --> GPIO32
#HDD_Power6 --> GPIO33
#HDD_Power7 --> GPIO34
Front LCD Display
The front LCD display is controlled using the second serial port at 38400 baud. It seems like the BIOS actually communicates with the LCD in order to control messages that appear during POST.
There is a python library that can interface with the LCD display but the documentation is lacking.
LCD messages are controlled by writing an 8-bit value to lcd_set_dispitem (0x32), where each bit corresponds to:
1  link speed
2  disk status
4  hostname + ip
8  Unknown (all dashes)
16 date time
32 boot message
64 Custom Message?
128 Unknown (blank)
The example code from the Python library sets the bitmask to 0x3F to show everything except the boot message. I use 0x34 to only show hostname, date, and a custom message.
Sensors
Install lm_sensors and run sensors-detect. It should detect both it8721-isa-0a10 and coretemp-isa-0000.
root@bnas:~# sensors
coretemp-isa-0000
Adapter: ISA adapter
Core 0:       +45.0°C  (crit = +100.0°C)
Core 1:       +44.0°C  (crit = +100.0°C)

it8721-isa-0a10
Adapter: ISA adapter
in0:          +3.04 V  (min =  +0.74 V, max =  +2.88 V)  ALARM
in1:          +2.80 V  (min =  +2.32 V, max =  +0.64 V)  ALARM
in2:          +1.99 V  (min =  +1.54 V, max =  +0.01 V)  ALARM
+3.3V:        +3.26 V  (min =  +2.02 V, max =  +0.89 V)  ALARM
in4:          +1.19 V  (min =  +2.33 V, max =  +0.12 V)  ALARM
in5:          +2.22 V  (min =  +2.66 V, max =  +1.32 V)  ALARM
in6:          +1.45 V  (min =  +2.32 V, max =  +0.78 V)  ALARM
3VSB:         +3.26 V  (min =  +3.41 V, max =  +0.31 V)  ALARM
Vbat:         +2.83 V
fan1:        2076 RPM  (min =   10 RPM)
fan2:           0 RPM  (min =   14 RPM)
fan3:           0 RPM  (min =   31 RPM)
fan4:           0 RPM  (min =   -1 RPM)
temp1:        -70.0°C  (low  =  +0.0°C, high = +61.0°C)  sensor = thermal diode
temp2:        -70.0°C  (low  = +111.0°C, high = -82.0°C)  ALARM  sensor = thermal diode
temp3:        +28.0°C  (low  = +54.0°C, high = -42.0°C)  ALARM  sensor = thermal diode
intrusion0:  ALARM
All voltages appear to be out of range for some reason.
Fan Control
You can disable/enable the fan by specifying a PWM value (0 - 255):
## Disable the fan
# echo 0 > /sys/devices/platform/it87.2576/hwmon/hwmon1/pwm3
Automatic fan control can be accomplished with fancontrol. Run pwmconfig to set up the fan configuration. Note that hwmon0 temperatures correlate to the CPU temperatures.
Once configured, use fancontrol to manipulate the fan speed. Use the fancontrol.service to have systemd automatically start fancontrol.
# pwmconfig
# cat /etc/fancontrol
INTERVAL=10
DEVPATH=hwmon0=devices/platform/coretemp.0 hwmon1=devices/platform/it87.2576
DEVNAME=hwmon0=coretemp hwmon1=it8721
FCTEMPS= hwmon1/pwm1=hwmon0/temp2_input
FCFANS= hwmon1/pwm1=hwmon1/fan1_input
MINTEMP= hwmon1/pwm1=45
MAXTEMP= hwmon1/pwm1=65
MINSTART= hwmon1/pwm1=60
MINSTOP= hwmon1/pwm1=50

# systemctl enable fancontrol
# systemctl start fancontrol
See Also
- Official Updates - http://buffalo.jp/support_ap/support/products/ts5400.html
- Python Library to drive the LCD - https://github.com/1000001101000/Python_buffalo_libmicon
- Debian Image Information - https://github.com/1000001101000/Debian_on_Intel_Terastations
- ZDNet Review from 2012 - https://www.zdnet.com/article/buffalo-terastation-ts5400-first-take/
- Hardware info: https://buffalonas.miraheze.org/wiki/Terastation_TS5400DN

